Anderson Valley House Project

Thursday, August 31, 2006

A Major Pour

Annotated panorama. (Click on the picture to see a larger view)


A lot of concrete was poured on Tuesday. The pour included the wall on the downhill side of the covered patio and garage and the stem walls for the shop, exercise room, and pool bathroom. The overall shape of the house is now much more apparent. (Well, apparent if you have the plans in hand; without the plans, it probably still looks like a bunch of concrete.) The next step is to start placing the fill but the concrete has to be given time (up to 2 weeks) to cure and gain strength before that is done. Once the fill is in place, the slabs for the covered patio, exercise room, and pool bathroom will be poured.

When we started the design process, one of the items I insisted on was easy access to the space beneath the shop. I didn’t need a full basement but at least enough space to make it easy to install a dust collection system and to run all the ducting under the floor. One of the side effects of the fixes for the expansive soil problem was a much larger shop basement; I now have a full sized, full height basement. I do have to share it with the pool equipment, however.


The shop foundation looking uphill

The big wall at the front of the covered patio and garage and the back of the shop

Puppies!


This post is totally unrelated to the house construction but who doesn’t like puppy pictures? Blanquita, Adam and Jessica’s dog, had 9 puppies on August 26th. Blanquita is very sweet as is the father. We assume the puppies will be equally good tempered. Want a puppy? Some are spoken for (no, we aren’t going to take on a 4th dog) but if you’d like one, give us a call.

Tuesday, August 22, 2006

More Foundation Progress


The work to mitigate the expansive soil was completed and the footings for the covered patio, shop, and pool buildings poured. The forms for the stem walls for the same areas are now in progress. Once the stem walls are complete, the first wood framing will appear. Jim (the builder) wants to give the concrete time to cure before backfilling and pouring the slab portions of the foundation. The slab on the covered patio will be the first final finish to appear so we have to decide exactly how we want the concrete to appear. (Stained? Tinted on site? Tinted in the mix? This will be the first of many decisions like this. Hopefully, we’ll get some right.)

The pool work should start soon; they’ll excavate and complete the rough work. Over winter, we’ll have a big hole lined with gunite which collects a bunch of water. Next summer they’ll do the finish work.

What has struck me the most about building a house from original design to concrete is the unforgiving nature of the process. If I were to be a builder, I’m sure that shortly after pouring thousands of dollars worth of concrete I’d realize I’d forgotten to leave an opening for a door or window. Even worse, my measurements would be off by an inch. In the kind of engineering work I’m used to (software), a mistake is usually easily corrected; no concrete has to be broken up or walls torn down. Software is the ultimate forgiving medium.

I mentioned this to our builder and he said that one of the signs of a good builder is how skillfully he (or she) corrects mistakes.

Wednesday, August 09, 2006

The Foundation Continues

After a delay to fix the expansive soil problem, we are back on track. In one area, 7' of soil under the foundation had to be excavated and replaced with "engineered fill", basically the fine rock you put on a non-paved road. As the fill was added, a little bit at a time, it was compacted and tested for sufficient compaction. Once this was completed, the trenches for the footing could be dug in the new fill. The plan has the next concrete pour, for the footings for the covered patio, garage, and shop, being done next week. That will be followed by the stem walls and finally the slabs (garage and covered patio).

The backhoe is sitting on 7' of fill.


Digging the trench for the footings in the engineered fill. The large wall in the background is the near wall of the main house foundation.


In the meantime, the foundation for the main part of the house has been waterproofed and readied for "ratproofing". Ratproofing just means that the space between the foundation walls has a layer of compacted fill then a non-structural layer of concrete on top. I'm not sure how effective it is at keeping at rodents but it does make the crawlspaces drier and more usable.

The foundation of the main house, waterproofed and ready for "ratproofing"


One additional problem we had to solve due to the expansive soils was that the pool had to be moved about 17’. The new location actually has some advantages since it provides a good place for both the hot tub and an outdoor shower. (The latter has always been one of Holly’s requests.) For some reason, the pool contractor likes to do the excavation and primary gunite layer early, then let things sit (a fill with rain water) until the house is close to finished. The only thing I can think of is that the excavation is messy and requires heavy equipment, not a situation you want to deal with close to a finished house. In any case, he is slated to start his work soon.

Saturday, August 05, 2006

Construction starts

Finally, at the very end of May in 2006 we broke ground. The foundation for the main part of the house went quickly but the excavation under the large covered patio, garage, shop, and pool showed a sinuous vein of "expansive" clay which wound its way between every test pit the soils engineer dug. Tests showed the clay to be very weak and unable to provide support for a foundation. The typical solution to this type of problem is to excavate the clay several feet below the foundation (5-20') and replace the soil with compacted "engineered fill" (road base). The idea is to excavate down to a point where the moisture content is stable so that there is little change in soil volume due to moisture change.  In our case, the vein wound its way across the foundation in way that caused problems almost everywhere which would have required a massive amount of soil removal. Fortunately, our structural engineer has lots of experience with conditions like this and he came up with a solution that required a less, but still substantial, amount of fill. The problem has still caused a delay of a couple weeks and increased the cost of the foundation a significant amount. We have a large contingency fund built in to the construction estimate but I didn't expect to hit it so hard this early in the process.


The foundation for the main part of the house

800 cu yds of fill

The House Plan


After exploring the land and learning about the valley for 4 years, we decided it was time to start the process to build a house. The first plan sited the house at the highest point the road reached where the view was the best. In retrospect, this was also the site that was the most exposed and had the feel of being perched on a saddle. This plan was not to be, however, since soil tests revealed the presence of a "slickensides" layer in the soil. This can result in movement of up to 1/8" a year. That might not sound like much but imagine what would happen to a pool if one end moves 1/8" and the other doesn't

Fortunately, an alternative site was easy to choose. It has the benefit of being more sheltered and not having the "perched" feeling. The soil tests came out clear so we started on what turned out to be a 2 year design process. After a year or so of design, we looked at where we ended up and decided that we had gone astray and some redesign was in order. Several months later we were back to what we thought was a reasonable design that worked well for both just Susan and me but could accommodate a horde of relatives.

The key aspects to the design are a large kitchen designed for someone who spends a lot of time cooking; a large shop for someone who spends a lot of time woodworking; a pool since the summers can get hot; a large garden area for both flowers and vegetables; and lots of common space, both indoor and outdoor, to accommodate lots of people.

Finally, we had complete plans (hah! we've already made minor changes) late in 2005 and the county gave us a building permit. Unfortunately, it was too late in the year to start construction. Our contractor did not think it was a good idea to start excavation just as the rainy season was starting. After scrambling to get the plans finalized, we had to wait another 7 months.

Friday, August 04, 2006

The Yurt


After taking many day trips to explore the land, we decided we needed a place to stay overnight. We thought about a tent platform but wanted something a little more substantial. Susan's sister Donna pointed out an article about yurts which got us thinking about them. After some research, we bought a kit for a 16' yurt from Nesting Bird Yurts (now Ranier Yurts).

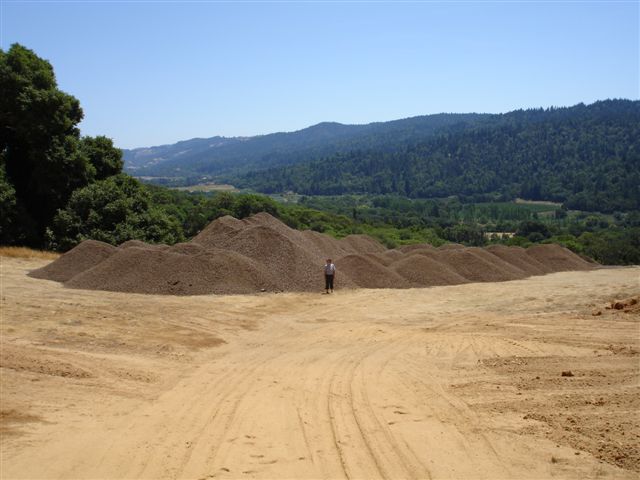
First, the platform below is what we started with. Susan and I built this platform over a 7 week period working only on Saturdays. Unfortunately, the last major work day seems to have badly injured her knee so she will need arthroscopic surgery to fix a torn meniscus. (This is a piece of cartilage between to bones of the knee.) During the yurt raising she set up the food and drinks since she isn’t very mobile.

The platform (Picture 1)


The yurt we bought came as a kit. We got to choose the size (18’ diameter), color, number of windows and doors, amount of insulation, and accessories. What was delivered was an enormous collection of pieces some of which were quite heavy. Fortunately, the delivery truck had no problem making it up our road then backing across the grass to the staging area. Unfortunately, the staging area was still a good 200 yards from the yurt site and only half of that distance was navigable by a 4 wheel drive. (More on this later…)

We drove home after the Thursday delivery excited by the prospect of finally getting the yurt set up but also worrying about how to get some of the heavy and awkward pieces down the trail to the platform. Fortunately, we heard that night that Jeff, our nephew was going to come. He has lots more construction experience than I, is younger and stronger, and very bright. We already knew that Donna and her husband John were coming along with our friends the Petta’s. (The Petta’s make heavy use of our Tahoe house in the winter so are always looking for ways to pay us back.) Both Holly and Adam (and Jessica his girlfriend) were also going to come.

Saturday morning, I started out early since I had some last minute hardware I had to pick up. I also wanted to get to the site before anyone else. When I arrived at our gate at 10:30 AM, no one was waiting so I figured I’d have a little time to set up. I unlocked the gate and drove up the road to the staging area only to find the pile of yurt pieces was missing. At this point, the first thing through my mind was having to call the sheriff and tell him that our yurt was stolen. Earlier in the week, we had talked to a guy who has done some work for us about moving the pieces down to the site but decided our crew could do it. At this point, my only hope was that he had gone ahead and done it anyway even though we told him not to. As I walked down the trail to the platform, a large pickup truck came into view along with 2 guys sitting on the platform chugging from water bottles. I noticed the entire pile or yurt pieces divided between the ground and the back of the pickup as Jeff greeted me. He had left San Jose at 6:30 that morning and had made it to Boonville at 9:30 AM. He also had a friend with him who “thought it would be fun to put up a yurt”. When confronted with the locked gate, they dismantled the fence next to it, drove around the gate, then reassembled the fence. They then found a path through the trees where the pickup would fit and moved all the yurt pieces to the site. (Jeff’s pickup is huge and has wide tires so it can go over almost anything and negotiate steep hills. After he drove it out, I was hard pressed to find his track.)

Incidentally, Jeff seemed to be in very high spirits so I asked him how work was. He said he had been locked out of his office the day before and he was no longer with his company. He founded this company and sold it last year. With the sale, he was obligated to stay 2 years but he has been very unhappy with the directions the new owners are taking. He has been hoping they would fire him for the last 6 months. When I asked about a settlement, he smiled and said, “the lawyers are talking”.

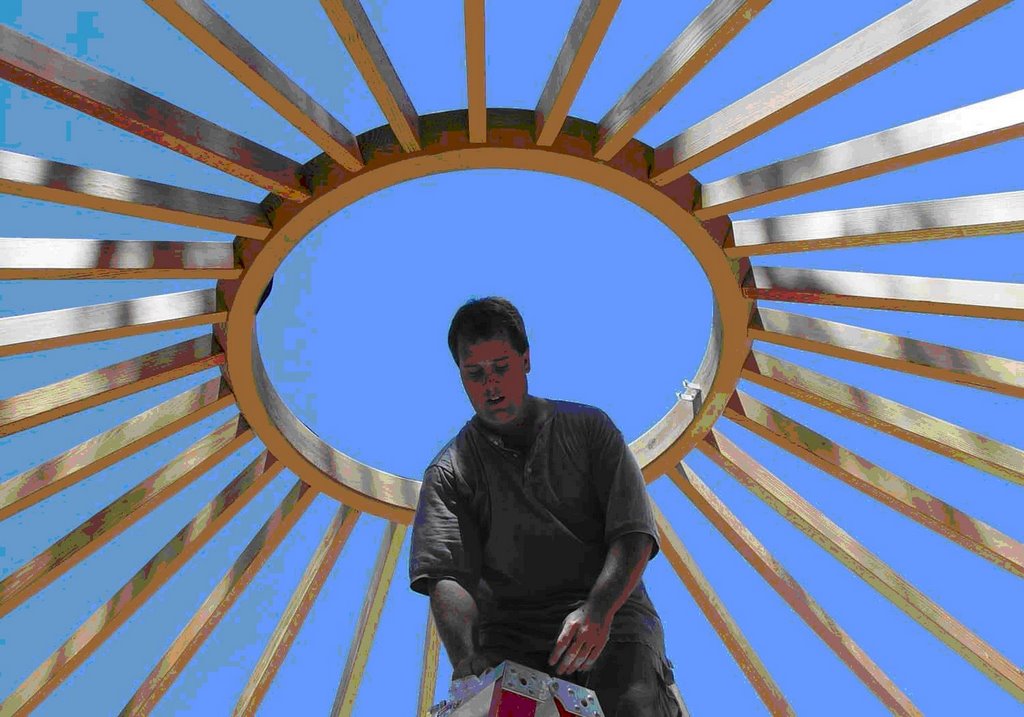
We then went to work assembling the pieces. The lattice wall on the perimeter went up first. This started simply but the height had to be within ¼” all the way around. This entailed pulling and pushing to stretch or compress it to adjust the height. Once the height was correct, the lattice wall was attached to the platform by screwing through straps that project below the top of the platform. A cable is then strung all along the top of the lattice wall. This is what the low ends of the rafters attach to. The high end of the rafters attach to a “compression ring” at the top center of the yurt. The yurt company recommends renting scaffolding to hold this in place until enough rafters are up to hold it. Since our site made scaffolding really difficult, I had built a jig out of 2x4’s to hold it up as per the advice of the yurt company. Well, it turned out that the compression ring wasn’t that heavy so we attached 2 rafters to it and Jeff and Adam held it over their heads while standing on stepladders while others attached the rafters to the perimeter cable. It was very quick and easy and rafters held up the ring just fine. After that we put the rafters up as fast as they were passed inside. (For those engineers in the group, the rafters are locked to the compression ring with a clevis pin and the cable with a retaining bolt.)

Planning for the rafters after the lattice wall is up


Setting the first rafters (Jeff and Adam)


While they bulk of the group was assembling the frame, a smaller group was trying to tape the insulation together. Each layer of roof insulation comes as 15 wedge shaped pieces that have to be taped together. Since we are out in the woods on a hillside, they found a semi flat, grassy spot part way down the hill where taping would be easier. This lead to a new sport of “suicidal grass sliding”. One of the crew discovered he could get down the hill very fast by riding down on a large piece of packing cardboard. After his demonstration that that you could actually survive this, several others tried it and someone even tried to convince one of the many dogs to try it.

All the rafters up (Jeff’s halo)


Second insulation layer going on


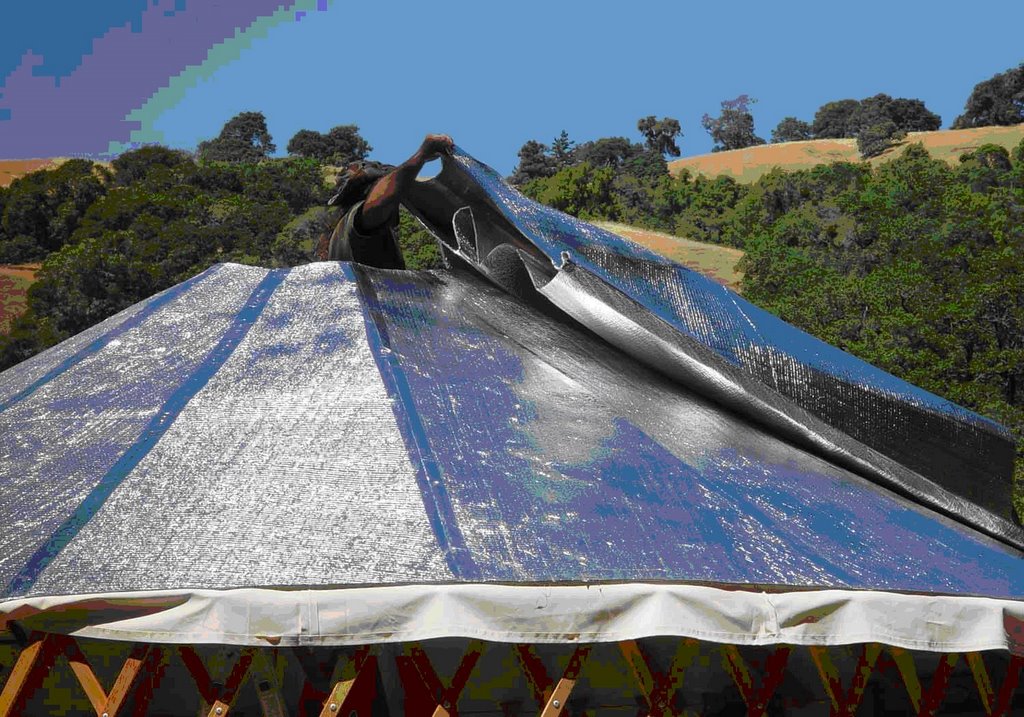
The roof is made up of 4 layers: first, a white cotton liner; second and third, insulation with a silver reflective outer layer; and fourth, a waterproof outer layer. Unfortunately,
an afternoon breeze decided to arrive at this point. Fortunately, Jeff (again) had the answer and brought back some clamps from his truck. We used this to keep everything from blowing away until the outermost layer was on. Each layer was passed up through the central compression ring where Jeff’s friend John was staged. He held it in place and worked to unfold the layer with help from outside. Once ½ the layer was on, John pulled the other half across his head so that the whole roof was covered. It sounds really awkward and was but it worked quite well. Once the outermost, waterproof layer was on the roof was heavy enough to withstand the normal afternoon breeze. (It is more securely attached later.)

The walls of the yurt have 2 layers: first, a combined liner and insulation layer then the outer weatherproof layer. We paid extra so that our walls came in panels that we are easier to attach and can be replace or rearranged. Each inner and outer panel had to be attached to a cable that was part of the roof. Although this wasn’t particularly difficult, we all had tired, sore fingers by the end. The last step for the walls is to run a cable around the bottom of the panels and so that the wall system is tight.

Inner wall panels going up


Outer wall panels and skylight on


Almost exactly at 6 PM, we tied a rope to the skylight and pulled it up the roof to the compression ring and bolted it on. We were done.

The deck is the next project


The skylight and one of the windows


That night we went out to the Boonville Hotel for dinner then walked back down the trail to the yurt by flashlight. I was glad I had assembled our new futon before dinner since all I wanted to do when we got back was go to sleep.

What’s left to do? Finish the deck. Build a free standing cabinet we’ll use for a kitchen. Dig and build an outhouse. Rig up a solar shower. Put in a wood stove. Lots of fun stuff.
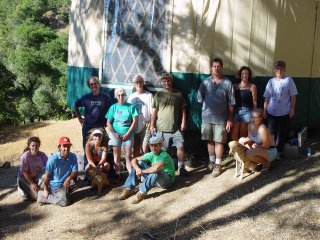
Finally, the crew:

Infrastructure

The pump house


Before we could do anything else, we needed a road to access the spot we identified as the best house site. We put in mile long road the following summer and except for one spot, it has held up through some extremely wet winters. After the road, we put in water and power. I designed the water system with advice from the local fire chief and a local electrician. We now have 6000 gallons stored high on the property and a 2" line running all the way down to the main road. There are 5 fire hydrants each which deliver 80-100 psi which is more than enough for fire fighting. The power system takes a standard 200 amp feed from the local utility, steps it up to 2400 volts, and transmits it underground up to the well site. From there it branches down to the house site.

There is no DSL or cable available in the valley so satellite internet and TV is required. Satellite internet is rapidly changing and 1 mbit/sec is currently available for download. This is marginal but workable.

Thursday, August 03, 2006

Anderson valley house project

I created this blog to provide information to friends and family on the progress on the construction of our house in the Anderson valley between Boonville and Philo (off Highway 128 on the way to Mendocino).


It has been a long process to reach this point. We looked at land in 2000 thinking it would take a long time to find the right piece. We first looked in the Alexander valley (one valley south and home to the Russian River) but soon discovered that the bay area real estate inflation had already hit there. Our local real estate agent suggested looking one valley north where price inflation had yet to hit. It is also more isolated so there is less danger of being overtaken by suburban tract homes. After looking at several pieces of land, we fell in love with a 200 acre parcel just off Highway 128 about half way between Boonville and Philo.

You can see it on Google maps at:

http://maps.google.com/maps?q=95415&ie=UTF8&t=k&om=1&ll=39.045069,-123.396721&spn=0.013549,0.024483

View the satellite image. The tiny white dot in the center is the yurt.

Below is a topo map with an outline of the land boundary. The road on the property is the one we put in. (The road labeled "Good Acre" actually doesn't exist.)


The land goes from street level to a high point farthest from the road via a series of benches. These benches are broken by series of separate wide drainages that provide very distinct and separate environments. As you hike from area to area, the feeling is one of discovery of a new and different environment as the next area appears.

One of the unique aspects of the land is the wealth of water resources. In addition to a year round stream, we have several year round springs. Although the stream is a trickle by September, the presence of any water makes the land unique and fosters a rich array of wildlife including turkeys, pigs, and deer. Due to a mutually beneficial arrangement with a local hunter, we have a freezer full of turkey, pork, and venison.

To the north is a large olive orchard which produces award winning oils. To the south are vineyards from Roederer Estate and Cakebread, two premium wine producers. Of our 200 acres, 1/4 is probably plantable but we have no intention of becoming a vineyard at this time. In recent years, the valley has gone through a period of massive agricultural change where orchards have been ripped out in favor of vineyards. Our neighbors became noticeably friendlier when we told them we had no intention of planting a vineyard in the foreseeable future.